Fireworks Lesson 1
Lesson Objective |
Skills Learned |
Resources Needed
Paramount Studios Photo
Concert Photo
Street Corner Photo
Find Him Photo
1 |
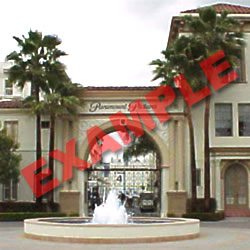
Click on the link to the Paramount Studios Photo (listed above in Resources). Once the photo appears, right-click on it and choose Save Picture As or Save Image As. Ask you teacher where you should save your photo to. Choose that location and click Save.
|
2 |
Open Fireworks CS6. Usually it would be found in your your list of programs, under the Adobe heading. There should be a folder on your desktop labeled Adobe CS6; inside that folder you'll find Fireworks.
|
3 |
With the program open, choose File > Open, or press Ctrl & O on the keyboard to open a new document.
When the Open Window appears, use the look In navigation menu at the top to choose the location in which you saved your Paramount Studios Photo. Once you find the photo click on it, then choose Open. You should now see the photo opened inside Fireworks. As you can see, this photo is dark and a little blurry. This is because it was taken with a low resolution camera, on an overcast day. |
4 |
The first step in improving this photo is to remove the parts of the photo you don’t need. Before beginning this step, view the Animated Demo Below.
|
|
|
From the Tools Window, choose the Crop Tool . click and drag a box to include the palm trees on both sides of the gate, making sure not to get the bush in the foreground.
Once you have made the selection box, match your width to your height in the properties panel. Double-click inside of the selected area to crop out the unwanted portion of the photo. |
5 |
It is always a good idea to save your work every 5 minutes. Press Ctrl + Shift + S on the keyboard to do this. The Save As Window will appear. Type Paramount Studios as the file name and click Save. Be certain the file saves as a PNG, if the file extension is set to .jpg, manually change it to .png.
|
6 |
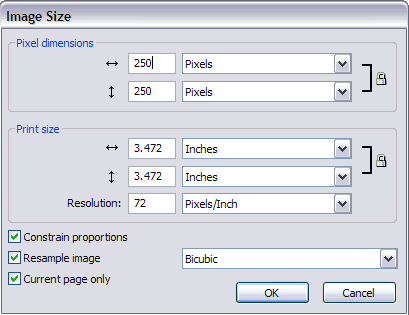
From the drop-down menu choose Modify > Canvas > Image Size. When the Image Size window appears, match your settings to those shown at the right.
Click OK. Note: Check all the settings, such as Constrain Proportions. It is very important to make sure that Constrain Proportions is checked, because if it isn't your image will be squished, as seen below. 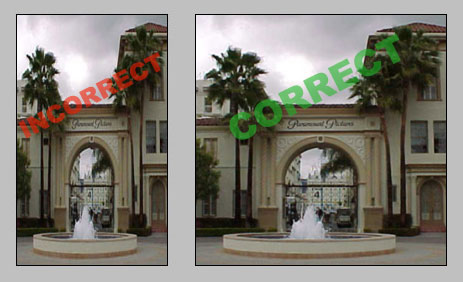
|
7 |
Use the Pointer Tool to select the image.
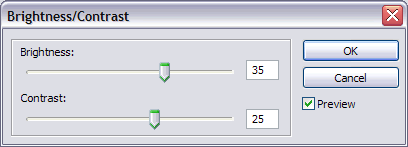
From the drop down menu choose Filters then choose Adjust Colorsthen Brightness/Contrast. When the Brightness/Contrast window appears, match your settings to those shown at the right. Click OK. |
8 |
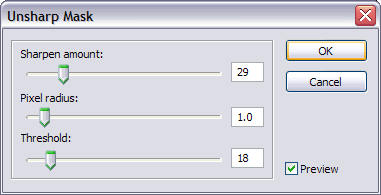
Lastly, the fourth step is to sharpen the photo. This photo just needs a little sharpening, so with the photo still selected, from the drop down menu choose Filters, then Sharpen then Unsharp Mask. When the Unsharp Mask window appears, match your settings to those shown at the right.
Click OK. |
9 |
Your image should now look like the example below.
|
10 |
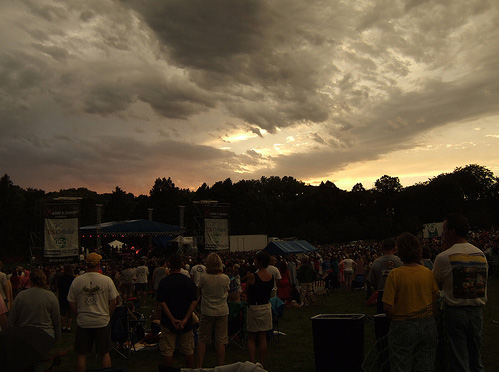
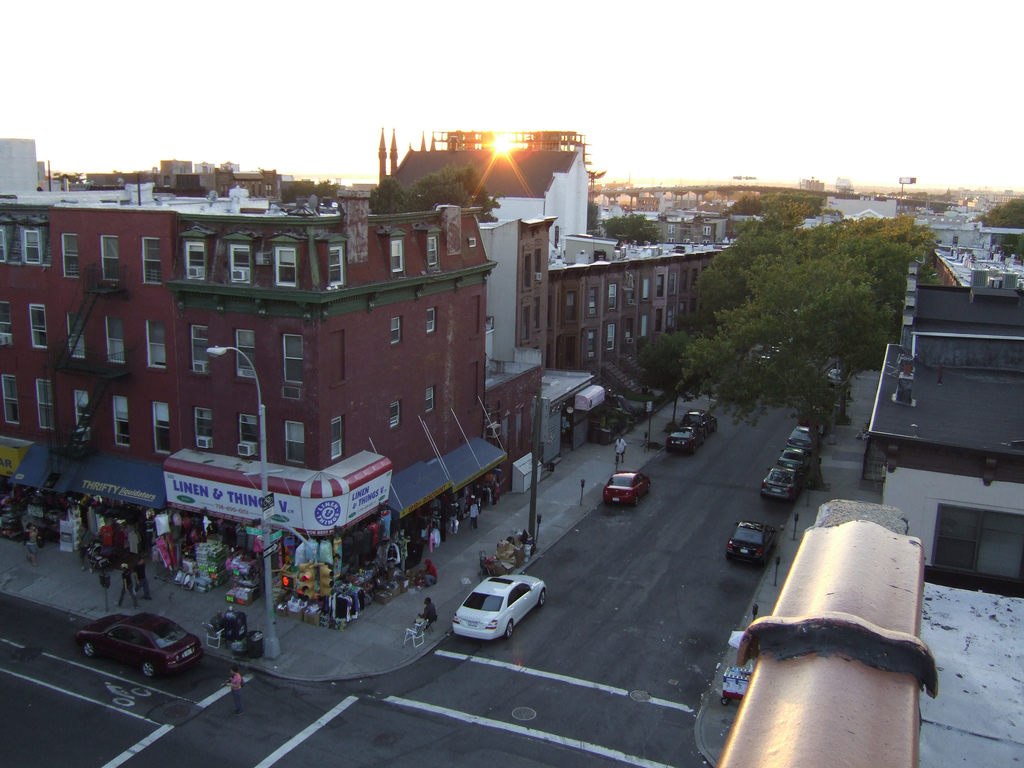
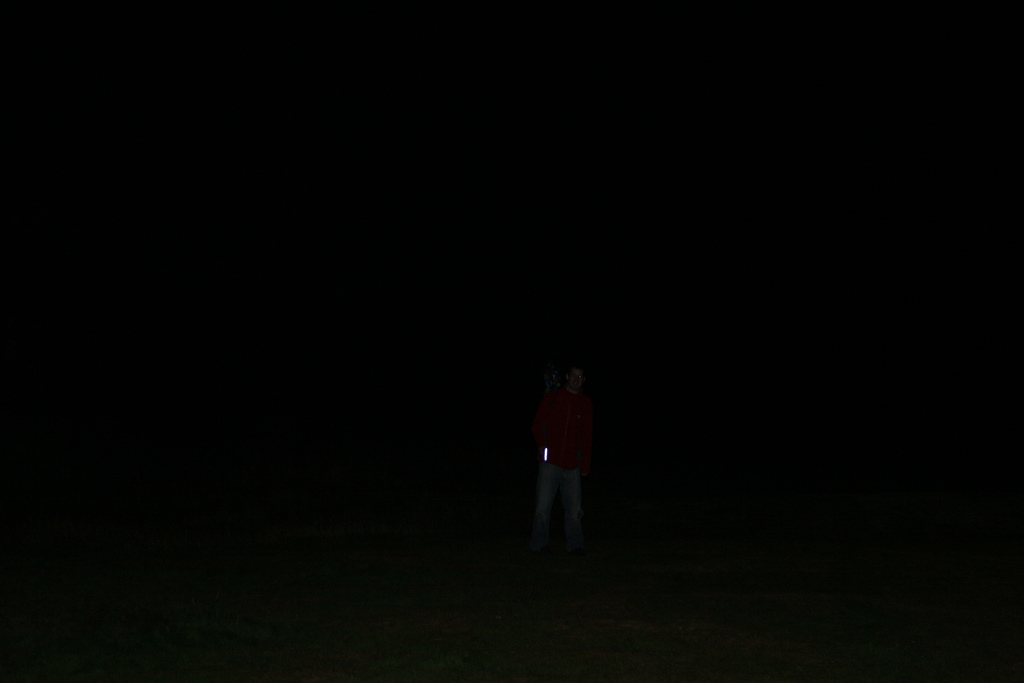
Apply the four step process learned in this lesson to the following photos: Concert, Street Corner and Find Him. Your finished photos should look as closely as possible to the examples below.
- Match your dimensions to those specified below. - Some photos below may need the Brightness/Contrast adjusted more than once. - Save each image as a .jpg file in a location specified by your instructor. |
|
|
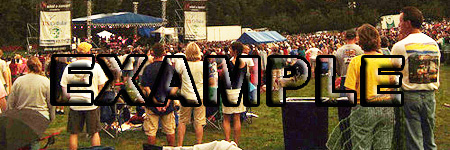
Width: 450
Height: 150 |
|
|
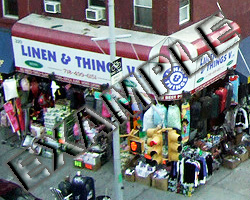
Width: 250
Height: 200 |
|
|
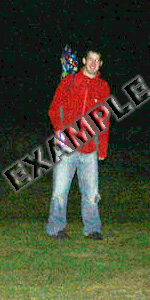
Width: 150
Height: 300 |
