Fireworks Lesson 3
Lesson Objective |
Skills Learned |
Resources Needed
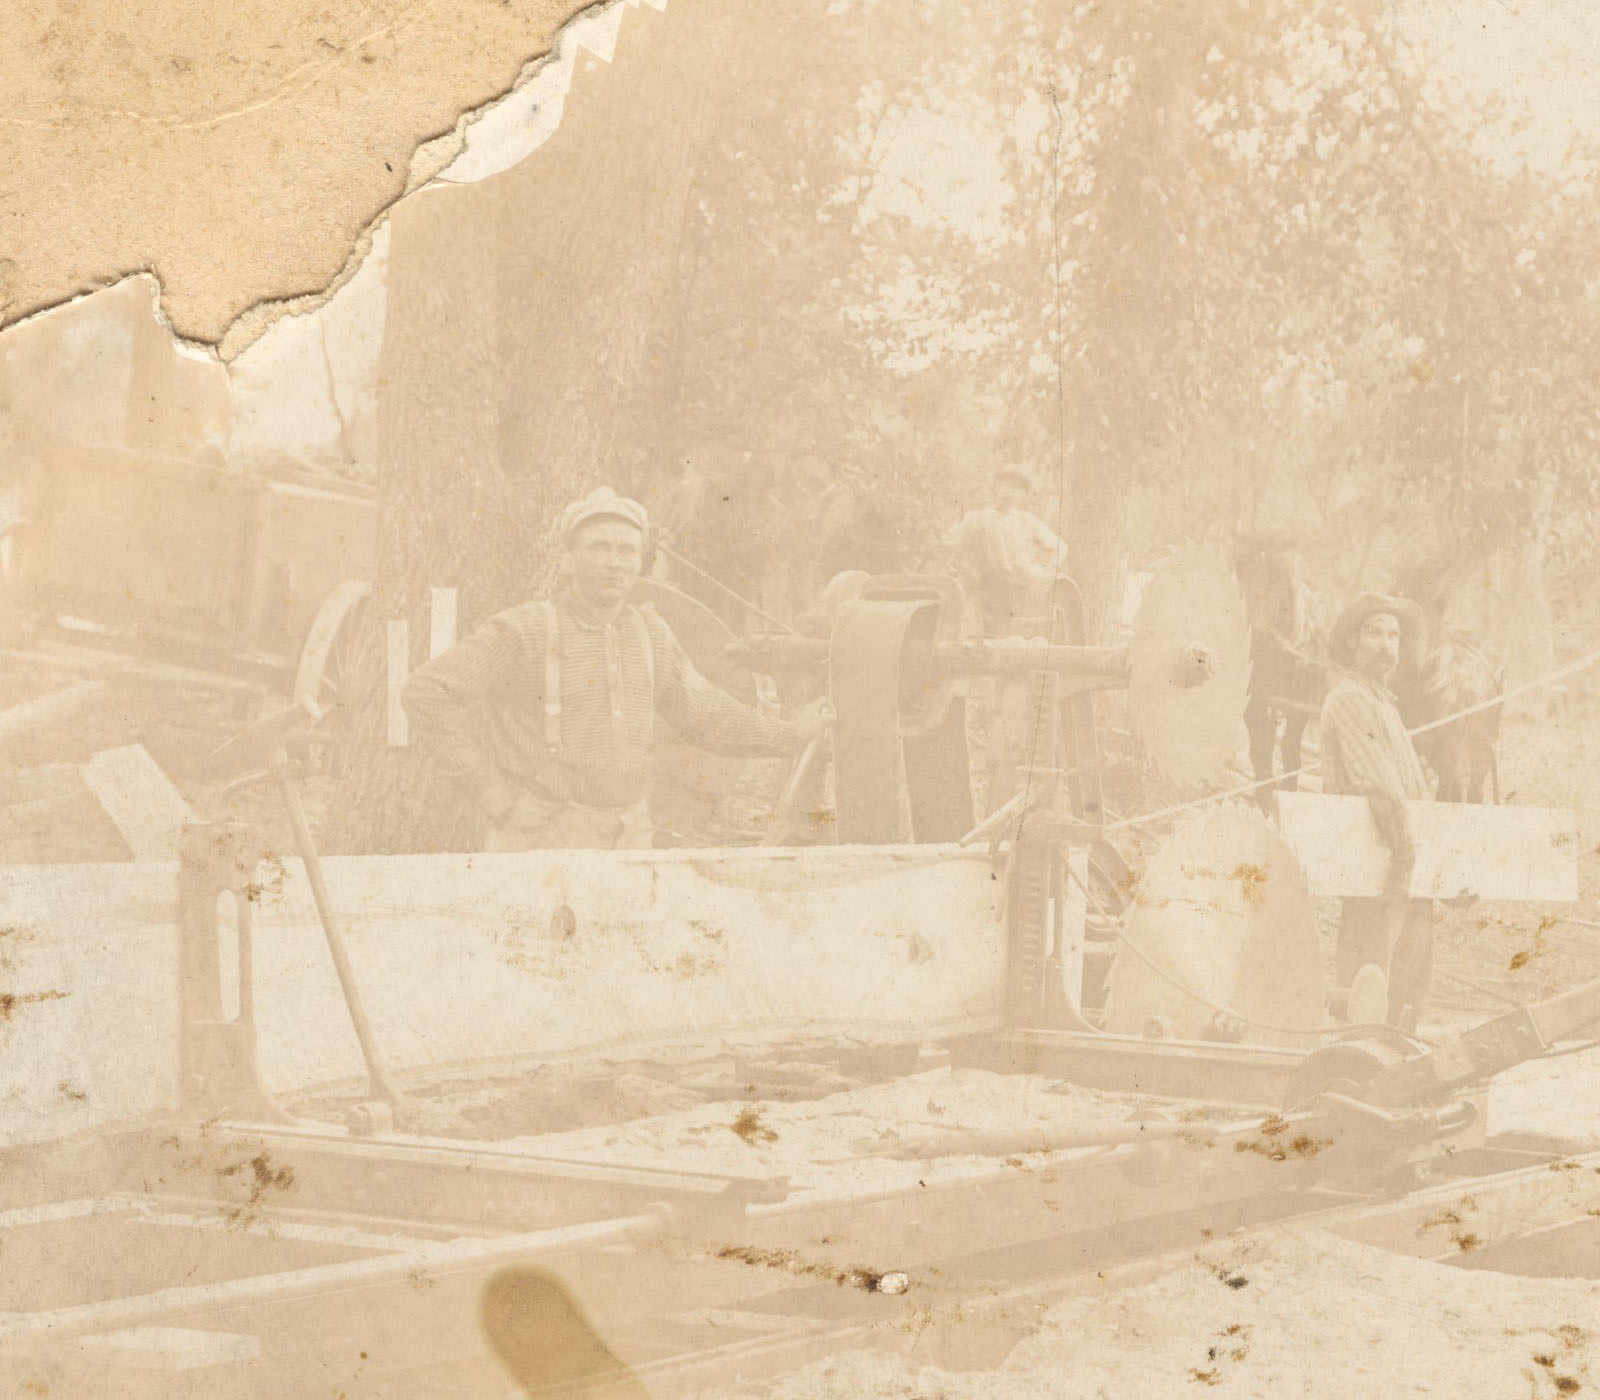
Lumber Crew Photo
12 |
Click on the link above to open the Lumber Crew image. Right-click on the image and choose either Save Image As or Save Picture As to save it at a location specified by your teacher.
Open Fireworks, then press Ctrl + O. When the Open Window appears, navigate to where you have saved the lumber crew photo, select it, then click Open.
You should now have a photo of a lumber crew from the early 1900's open in Fireworks. It is easy to see that the image is in a very poor condition. It is faded, the upper left corner is ripped off, and it contains many blemishes throughout. Photos like this one can never be restored to their original condition, but Fireworks has many tools for photo improvement. With a little patience and persistence, you will be surprised how much of the original photo you can restore. |
3 |
From the drop-down menu choose Filters > Adjust Color > Auto Levels.
|
4 |
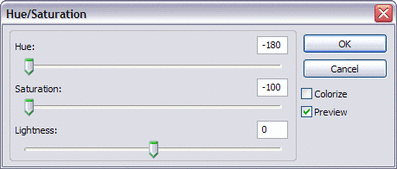
This photo was originally black and white. One way to remove the color is to use the Hue and Saturation settings. From the drop-down menu choose Filters > Adjust Colors > Hue/Saturation. Match your settings to those shown at the right.
|
5 |
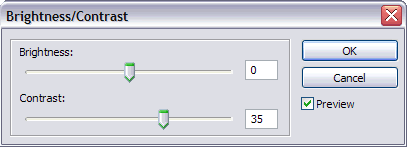
Click on the photo with the Pointer Tool to make sure it is still selected. From the drop-down menu choose Filters > Adjust Colors > Brightness/Contrast. Match your settings to those shown at the right.
|
6 |
There is no way to bring back what was torn off the corner of the photo, but you can use what is still in the photo to extrapolate what might have been there.
Click on the Rubber Stamp Tool and in the properties panel, set its size to 50 pixels. Use the tool to clone the tree upwards and the sky from the right, over to the left as seen in the animated demo BELOW. |
|
|
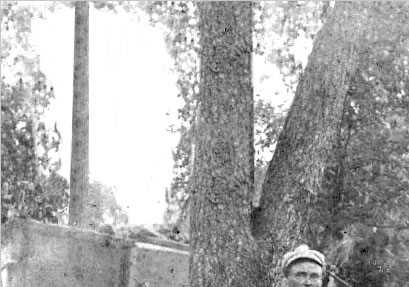
Your extrapolated sky should look different from anyone else's in your class, but everyone's should look natural like the one below. |
7 |
Use the Rubber Stamp Tool to remove all the marks and blemishes from the photo. THIS STEP SHOULD TAKE LONGER THAN ALL THE OTHERS COMBINED. THERE ARE ALOT OF MARKS AND BLEMISHES!
|
8 |
Use the Smudge Tool to smooth out the faces of both men as seen in the animated demo below. Make note of the settings in the properties panel.
|
9 |
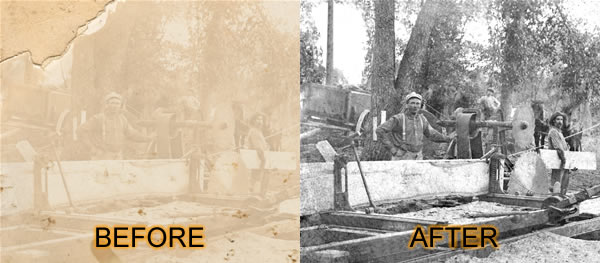
You should see great improvement in your photo, as seen below.
|
