Fireworks Lesson 4
Lesson Objective |
Skills Learned |
No images/files needed
1 |
Choose File > New to open a new document. When the New Document Window appears, set the document width to 650, its height to 450, and make sure its resolution is set to 72 pixels/inch. Set the Canvas Color to white, then click OK.
|
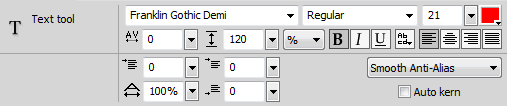
2 |
Choose the Text Tool. Match your properties panel to the settings below.

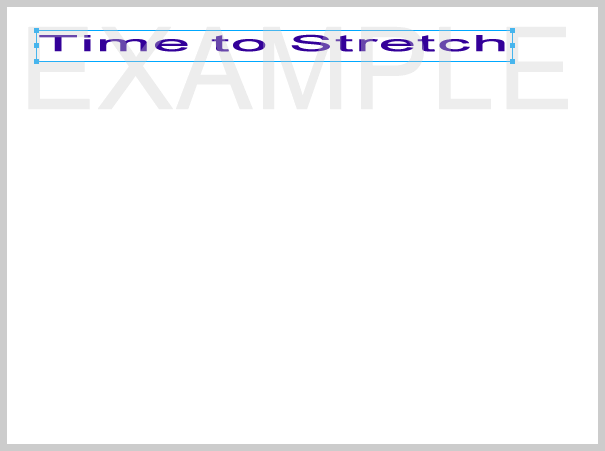
Click anywhere on the white canvas to deselect the text.
|
3 |
With the Text Tool still selected, match your properties panel to the one below.

Type Typing down is easy along the left side of your document, as shown in the status check below.

Click anywhere on the white canvas to deselect the text.
|
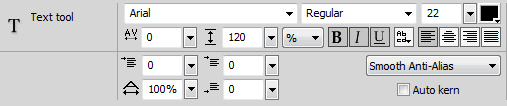
4 |
With the Text Tool still selected, match your properties panel to the one below.
Just beneath your top line of text type Underline, Bold, and Italicize.
Click and drag to highlight the word Underline, then in your properties panel, click the Underline button. Click and drag to highlight the word Bold, then in your properties panel, click the Bold button. Click and drag to highlight the word Italicize, then in your properties panel, click the Italicize button. Your document should look like the status check below. 
Click anywhere on the white canvas to deselect the text.
|
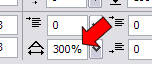
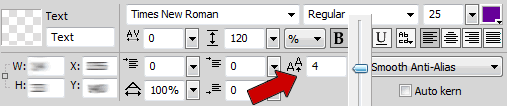
5 |
With the Text Tool still selected, match your properties panel to the one below.

B 0
a 4 s 8 e 12 l 16 i 12 n 8 e 4 space 0 S -4 h -8 i -12 f -8 t -4 When finished, your document should look like the status check below. 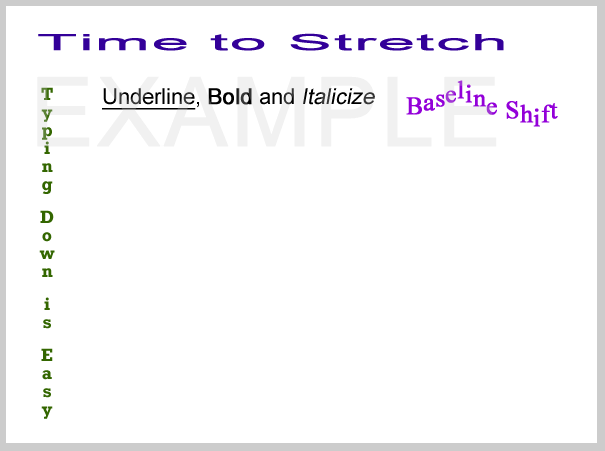
|
7 |
Select the Text Tool and match your properties panel to the one below.

Type the word BEVEL in the bottom left quarter of your document. Click on the word, then give it an inner bevel effect as seen in the animated demo below.
|
8 |
Repeat the procedure in the previous step to add the Blur, Glow and Shadow to the appropriate words as seen in the example at the right.
Experiment and adjust the filter settings to match the example at the right as closely as possible. Keep in mind that not every computer has the same fonts installed on it, so you may not be able to match the example perfectly. |

|
9 |
Select the Text Tool and set the font to Cooper Std, the size to 24, the color to a light-medium blue.
Across the middle of your document type Did you know how to attach text to a path? Then use the Pointer Tool to drag the text to the top edge of the document. |
10 |
Select the Pen Tool then match its settings to those shown in the animated demo Below, then attach the text to the path as demonstrated.
|
Your done! Save your work as TextExample.png and turn it it below.
