Flash Lesson 1
Lesson Objective |
Skills Learned |
Resources Needed
No additional resources are needed.
1 |
|
Open up Flash™ and click FILE > NEW (Ctrl + N) to open a new document.
When the New Document window appears, click on the General tab.
Choose the setting for ActionScript 3.0 and click the OK button.
When the New Document window appears, click on the General tab.
Choose the setting for ActionScript 3.0 and click the OK button.
2 |
|
|
When you first open it, Flash can be a little intimidating. Once you understand what each part of the interface does, it will make a lot more sense. Watch the animated demo to the right.
IMPORTANT: Your Flash may look slightly different than the Flash in our "Status Checks" and "Animated Demos". The look varies based on the operating system your computer is using and the version and layout of Flash you are using. If your screen looks slightly different than the lessons, don't worry, all the essential information you need is there! As you have just seen, there are mny workspace layouts to choose from. We will be working in ESSENTIALS if you have Flash CS5 andClassic if you have CS5.5 or CS6. From the drop-down menu at the top of the screen, choose WINDOW then WORKSPACE thenESSENTIALS or CLASSIC. |
|
3 |
|
4 |
|
To set the size of the stage, from the drop-down menu choose Window then Properties. To the right of Size, click on the Edit buttion. Give your stage a width of 800 and a height of 500. Then click OK. Before you begin this lesson, it is important to make sure that all Snapping is turned off. Snapping is the ability of Flash to automatically connect what is being drawn to existing objects, grids or other items. To turn off all snapping, from the drop down menu click View > Snapping > Edit Snapping, then make sure all snapping options are unchecked.
If you haven't done so already, save your work. Remember to save every 5 minutes.
If you haven't done so already, save your work. Remember to save every 5 minutes.
5 |
|
In the Tools, click on the Line Tool . Notice that the options for the Line Tool immediately appear in the Properties Panel. By clicking and dragging your cursor over the stage, draw 2 horizontal lines, parallel to each other, near the top and across the entire width of your stage.
Use the Selection Tool and the Properties Window to changes the properties of the line and the position of the bottom line.
Use the Selection Tool and the Properties Window to changes the properties of the line and the position of the bottom line.
6 |
|
|
Click on the Pencil Tool . In the Properties Panel, change the Pencil's settings to the color Black, and its Stroke Height to 2, then it's Style to Solid. Click OK.
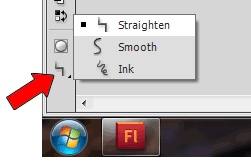
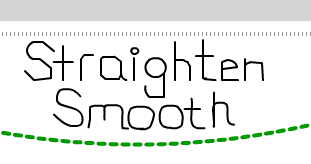
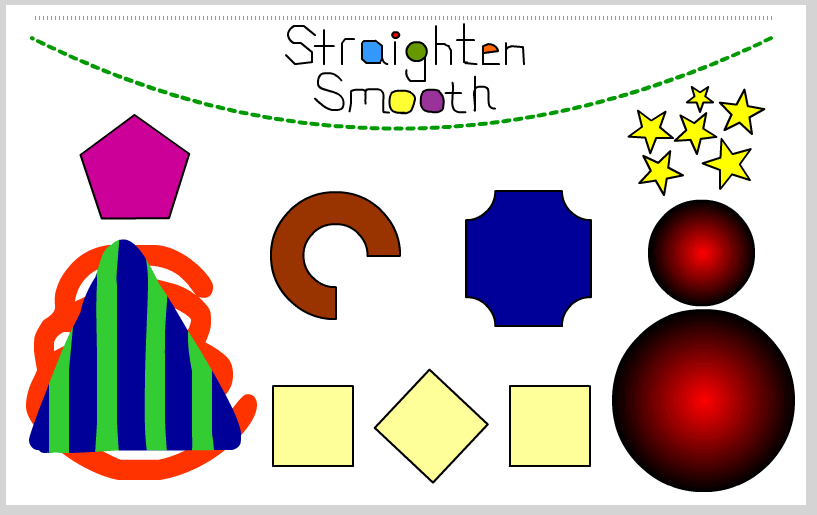
The Pencil Tool can automatically either straighten or smooth any line you draw. Look at the bottom of the Tools and you will see that the Pencil Mode Options are displayed. Set the Pencil Mode to Straighten, as seen at the right. Zoom your stage magnification in to 200%. Centered directly under the uppermost line, write the word "Straighten". Then change thePencil Mode Options to Smooth and write the word "Smooth" directly under the word “Straighten”. Make sure their size and positions match the Status Check below. |
NOTE: If you choose Ink in the Pencil Mode Options, your stroke will neither straighten or smooth. It will stay just as you have drawn it.
7 |
|
|
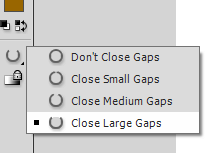
Click on the Paint Bucket Tool . At the bottom of the Tools in you will see the Options for the Paint Bucket. Choose the Close Large Gaps as seen at the right. This allows the paint bucket to fill in enclosed areas even if there are gaps in the boundaries.
In Properties Panel, choose a color. Using the Paint Bucket Tool, click inside the "a" in the word "Straighten". Next, choose a different color and fill in "g", the next enclosed letter. Continue doing this until all enclosed letters in the two words have been filled in with a different color. TIP: If you are having problems filling in you letters, zoom in. Your stage should now look like the Status Check below. |
8 |
|
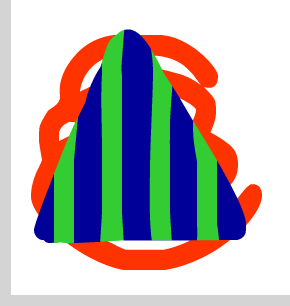
In the bottom left corner of the stage, Paint a solid dark blue triangle.
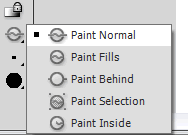
Change the Brush color to orange and choose "Paint Behind" for the mode. Draw some lines through the triangle, making sure the strokes extend beyond the edge of the triangle. Notice how Flash™ automatically places them behind the triangle upon release of the mouse button.
Change the Brush color to orange and choose "Paint Behind" for the mode. Draw some lines through the triangle, making sure the strokes extend beyond the edge of the triangle. Notice how Flash™ automatically places them behind the triangle upon release of the mouse button.
9 |
|
It's important to follow these next instructions in order.
Then click on the Brush Tool and change its mode to "Paint Selection."
Use the Selection Tool to select the blue triangle.
Next, change the brush color in the Colors Box at the bottom of the Tools to light blue.
Paint vertical lines overlapping the triangle. Notice how Flash™ only allows the area selected to be painted.
You can try the other brush options on your own at another time. The Stage should now look like the status check below.
10 |
|
|
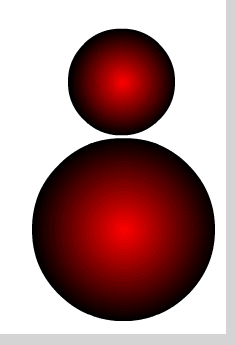
Click on the Oval Tool . In the Properties Window, click on the Fill Color Box and change it to red gradient shown at the right . Leave all other properties in the window the same.
While holding the Shift Key down, click and drag to draw a large circle in the bottom right corner of the stage. Use the Selection Tool to double-click on the circle to select it. Press Ctrl and C keys together on the keyboard to copy the circle. Next, press the Ctrl and V keys to paste a copy of the circle on the stage. NOTE: When you select the circle with the Arrow Tool to copy it, double-clickingselects the inner circle AND its border. This must be done because Flash™ treats the border and the actual circle as two separate parts. Click on the Free Transform Tool . Notice that the circle now has box around it with tiny squares on the corner. While holding the shift key down, click and drag one of the corner squares into the center of the circle, making it smaller. Next, click and drag near the center of the circle to move it above the larger one as seen in the Status Check below. |
11 |
|
|
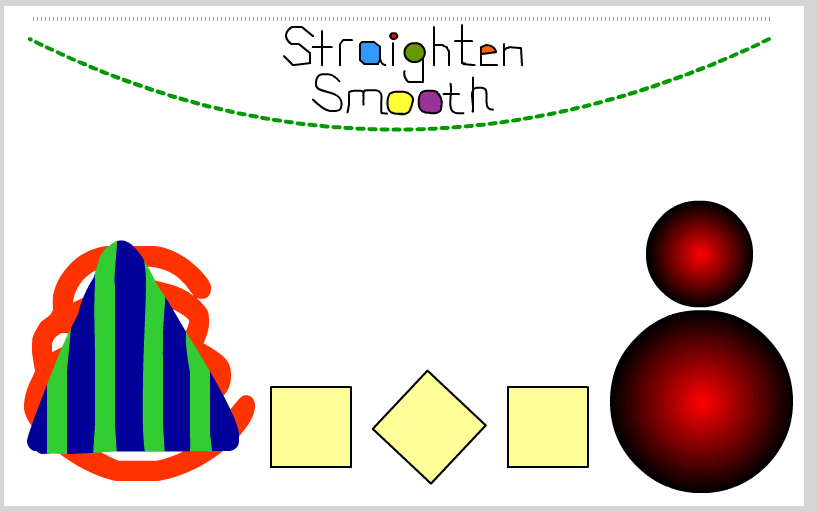
You are now going to make three recangles. Click on the Rectangle Tool . Then follow the example at the right.
Your stage should now look like the Status Check Below. |
12 |
|
|
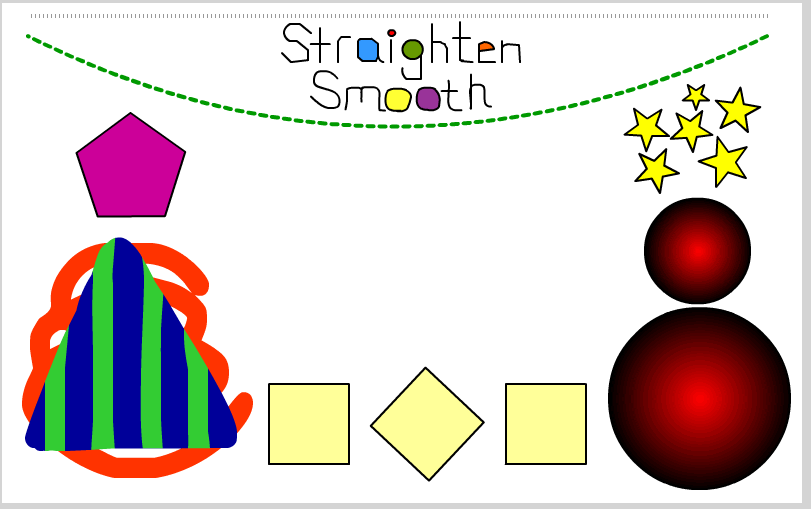
Hold your cursor down on the Rectangle Tool . When it appears, choose the PolyStar Tool . View the animated demo at the right.
Your final document should look like the status check below. |
13 |
|
|
Two new tools introduced in Flash CS4 is the Oval Primative Tool and Recantangle Primative Tool. Follow the animated demo at the right to learn how to use these.
Compare your final result with the status check below. |

