Flash Lesson 2
Lesson Objective |
Skills Learned Resources Needed |
1 |
|
Open the Flash. Choose File > New. When the New Document window appears, choose the General tab, choose ActionScript 2.0, then click OK.
2 |
|
In the Properties Window, set the stage width to 450 pixels and a height to 200 pixels.
Click File > Save (Ctrl + S) to save your file in a location specified by your instructor.
Click File > Save (Ctrl + S) to save your file in a location specified by your instructor.
3 |
|
|
Right-click on the image at the right, choosing Save Image As orSave Picture As to save it to your folder on your computer.
In Flash™, click File > Import > Import to Stage to bring the "template" image on your stage. Use the Selection Tool to drag the template image so it fits perfectly the stage. |

|
4 |
|
|
Change the name of layer 1 by double-clicking on the name Layer 1 in the timeline and change its name to Template. Click on the dot that is just beneath the Lock Icon in the Template layer to lock the layer so it can not be changed.
Click on the New Layer Button to make a new layer in the timeline above the Template Layer. Double-click on this layer to change its name to Drawing. Click on the Drawing Layer to select it. |
5 |
|
|
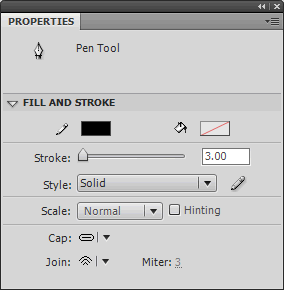
Choose the Pen Tool . Match you properties panel settings to those shown at the right.
Make sure Snap to Objects turned off. From the drop-down menu choose View > Snapping > Snap to Objects and making sure it is unchecked. |
|
6 |
|
|
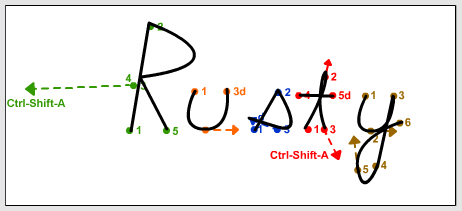
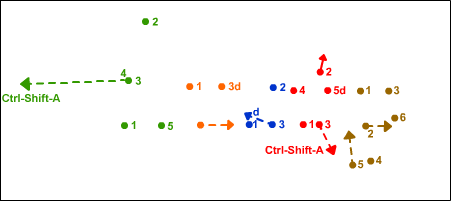
You are now going to use the Pen Tool to draw the letter "R". Click and release on Dot 1 and Dot 2. Next, click, hold and drag onDot 3 to the end of the dotted line before releasing the mouse button. Lastly, click and release on Dot 4. You should now have drawn the letter"R".
Press the Ctrl-Shift-A keys to deselect the letter "R". WATCH THE DEMO AT THE RIGHT!!!! |
7 |
|
|
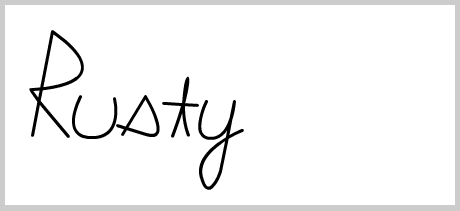
Use the same methods of clicking and releasing on dotsand clicking and dragging on dots with arrows. You will end up with a drawing of the name "Rusty" as seen at the right.
IMPORTANT: If your pen stroke keeps attaching itself to letters you have already drawn, press Ctrl + A then Ctrl + Shift + A. |
|
8 |
|
Right-click on the Template Layer in the timeline and choose Delete Layer or Delete Layers to remove the template from your document.
9 |
|
|
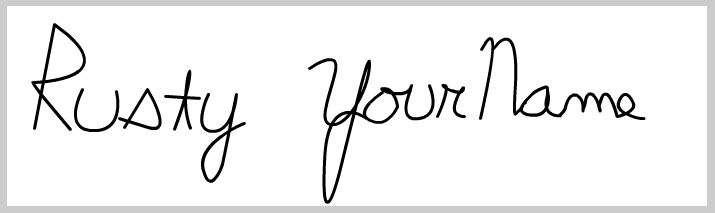
Use the Selection Tool to double-click on each letter individually and drag the letters together and to the left side of the document, as seen at the right .
|
|
10 |
|
In your Properties Window, change the width of the document to 700 pixels. You should now have a large white space to the right of the name Rusty. Use this space to draw your COMPLETE FIRST NAME with the Pen Tool , be patient, it will be difficult. Be prepared for it to take several attempts for each letter.
11 |
|
You have completed this lesson, save your work.
