Flash Lesson 3
Lesson Objective |
Skills Learned Resources Needed |
1 |
|
Open a new file (Ctrl + N) in Flash™. Choose to open a general Flash File with Action Script 3.0.
In the properties panel to make sure the document size is set to 550 pixels Wide and 400 pixels High.
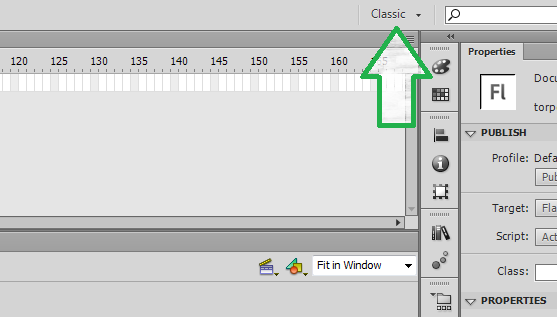
Make sure you are in Classic Mode
In the properties panel to make sure the document size is set to 550 pixels Wide and 400 pixels High.
Make sure you are in Classic Mode
2 |
|
|
Click on the Text Tool . Match your properties panel to the one shown at the right.
Click once at the top center of your document. Type the words Text in Flash. Compare your document to the status check. |
|
3 |
|
|
Click in the white area to deselect the text box. Match your properties panel to the example at the right.
NOTE: If your computer does not have the exact font options shown at the right, match your font as closely as possible to the example. Type the words “Spreading the text” in the bottom left corner. Make sure your document matches the status check below. |
|
4 |
|
|
Match your properties panel to the example at the right.
Start in the top left corner of your document and type Heading Down. When finished, your document should look like the status check below. |
|
5 |
|
|
Choose the Selection Tool ; then click on the Orange Text you have just typed. Press Ctrl + C to copy the text, then press Ctrl + V to paste it. Drag the text to the right hand side, so it sits opposite of the first one you typed. With the text still selected, click on the Text Rotation button , then set the Letter Spacing to 10.
|
6 |
|
|
Click in the blank part of the screen to deselect the text box. With the Text Tool selected, set the properties panel to what is shown below.
Type H2O. Select the 2 and change it to subscript. Change the font color to brown, and type 33=27. Select the second 3, and set it toSuperscript. Match the position of the two sets of text you have just added to the status check below. |

|
7 |
|
8 |
|
|
Click in the blank part of the screen to deselect the text box.
Select the Text Tool . In the Properties Panel, choose Mistral font (if you don't have Mistral, use another cursive font). Set the size to 44 and bold the font. Open the filters tab then click on the add filters button (shown at the right by the red arrow), then choose Glow. Match your settings to those shown at the right. Be certain your document matches the status check below. |
|
9 |
|
Click in the blank part of the screen to deselect the text box.
With your Text Tool selected, choose Impact text, size 60, and set the color to Blue.
Type the word Bevel in the remaining space.
With your Text Tool selected, choose Impact text, size 60, and set the color to Blue.
Type the word Bevel in the remaining space.
10 |
|
|
Choose the Filters tab in the Properties Panel. Click on the Add Filters button in the bottom left hand corner and Bevel and match your settings to those at the right.
This completes this lesson. Be certain your finished document matches the final status check below. Save as FlashText.fla. |
|

