Flash Lesson 4
Lesson Objective |
Skills Learned Resources Needed |
1 |
|
Open a new document in Actionscript 3.0.
In your properties panel, set the document size to 600 pixels (width) by 400 pixels (height).
Set your Frames per Second(fps) to 30.
Save your document as FlashAnimation.fla.
In your properties panel, set the document size to 600 pixels (width) by 400 pixels (height).
Set your Frames per Second(fps) to 30.
Save your document as FlashAnimation.fla.
2 |
|
|
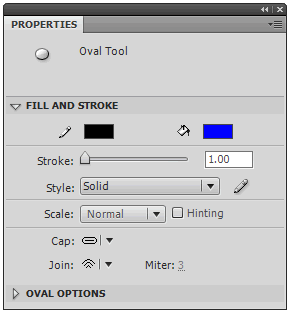
Choose the Oval Tool . Match your properties panel settings to those shown at the right.
Hold the shift key down and draw a small circle in the top left corner of your document. |
|
3 |
|
Follow the steps in the animated demo at the right to create a bouncing ball using a motion tween.
Status check below
4 |
|
|
As you can see in the status check above, the ball is moving rather quickly. To slow it down, as seen in the animated demo at the right, click above layer 1 around number label 7. Press the F5 key 15 times. Then press anywhere in the number labels later than 30 and press the F5 key another 15 times.
You have effectively doubled the length of your timeline, giving the ball twice as much time to travel the same distance. Therefore, your ball is now moving more slowly. |
5 |
|
|
You can also change the postion of the ball at any time. As seen in the animated demo at the right. Click on number label 30, then move the ball from the bottom center of the stage towards the bottom left corner.
Click on number label 60. Move the ball from the top right corner to the top center. Press the Enter key and your animation should look similar to the status check below. |
6 |
|
|
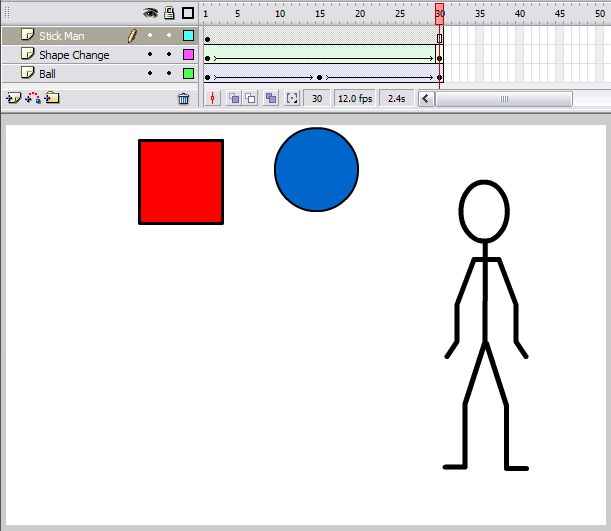
Click on the Insert Layer Button . Name the new layer Frame by Frame.
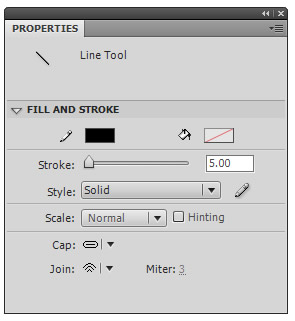
Using the Line Tool and the Oval Tool , draw a stick man on the right hand side of the document. When using the line tool, match your properties to those shown at the right. Be sure the stick man has his arms hanging to his side and that his arms include 3 parts (the hand, forearm, and upper arm). Compare your document to the status check below. |
|
7 |
|
8 |
|
You will make your stick man raise his arm and wave. To do this, repeat the process from the previous step between 20 and 40 times.
Keyframes will need to be placed in each of the remaining frames.
When finished, your animation should look similar to the status check below.
TIP: It's best to zoom in while working (Ctrl and +).
Keyframes will need to be placed in each of the remaining frames.
When finished, your animation should look similar to the status check below.
TIP: It's best to zoom in while working (Ctrl and +).
