HTML Project Lesson 7 - Final Site Review
Paramount to your web site's success is a final review of your site. It is a last opportunity to examine your web site. It is vitally important to canvas your site, looking for errors, omissions, or obvious needs of improvement. The instructions for building this site, has intentionally left a few loose ends. These are things that should be evident in a final review.
Of course, one could always add a great number of things that would improve the site. Throughout this lesson we have chose a few basic improvements.
Of course, one could always add a great number of things that would improve the site. Throughout this lesson we have chose a few basic improvements.
Open your home page (index.htm) in the browser, then navigate through your site. Look for things that could be added or corrected to improve your site.
You may have noticed that the text for the links is a different font type. In fact, arial font is used everywhere in the site, except for the links. To correct this problem, simply add the following opening <font> tag with its attributes before the links and the closing </font> tag after it, as shown below. Don't forget to add the attribute and value of size=2.

Save your HTML then view your page in the browser to make sure it looks like the image to the right
Just as you did on on the home page, change the face and size of the links on the other three pages.
Notice how all your link colors are purple, this is because by default, a link placed in a web page will be purple if the browser remembers visiting the page it is linking to. If the browser has not yet visited the page the link will take you to, the link will be blue.
You will change the link colors so that a link to a page that has not been visited yet(link)will be blue, a link to a page that has been visited(visited link)will be gray and a link in the process of taking you somewhere(active link) will be red.
Since blue is a more brilliant color than gray, this will make the links that have not been used stand out more, thus encouraging visitors to click on them.
The HTML to change link colors are attributes and values of the <body> tag, and therefore are found inside the body tag. Add the attributes and values shown below to the body tags of each page.
NOTE: If you are not seeing the link color as blue, it is because your browser remembers visiting the page you are linking to. If you want to see them as blue, you will need to clear out your computer's "cache". That is the place where your computer keeps a record of what web pages it has visited. To do this in Internet Explorer click Tools then Internet Options then under the General Tab, go to the Temporary Internet Files section and choose Delete Files. When a window appears, click Delete All Offline Content, the click OK.
Close your browser completely, then open the home page. Your links will be blue, until you use them of course, then they will turn gray. While a page is loading or until you click somewhere on the page, the link may be red.
Close your browser completely, then open the home page. Your links will be blue, until you use them of course, then they will turn gray. While a page is loading or until you click somewhere on the page, the link may be red.
Make the link color changes in the body tags of the other three pages as well.
Navigate to the Profile Page. Notice how there is much more room between the text and the links than there is between the heading and the text. The page would look better if the contents of the page were more evenly spread apart.
Place the HTML shown just before your opening <table> tag.
Place the HTML shown just before your opening <table> tag.
To bring the links up just a little higher on the page change the height attribute in the <table> tag to 250.
Save your file, refresh your page in the browser and make sure it looks like the status check below.
Save your file, refresh your page in the browser and make sure it looks like the status check below.
Open your Photos page. The primary problem with this page is that visitors will not know the photographs are links unless they place their mouse over the image and see the arrow turn into a hand. To correct this you will do two things, place text on the page and place an "alt message" on each image.
Right-click on the page to open up its source code, then add the following attribute and value to each of the <img> tags, as shown below.

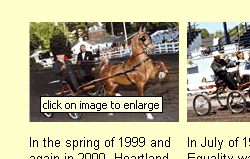
Add the same attribute and value for the second and third images on the page. Save your HTML, then refresh your page in the browser. Place your cursor over each of the three images and they should all display a message as seen at the right.
To make sure all visitors know the images are links, place a <br> tag after the closing </font> tag for the heading atop the page. Then place Click on any image to enlarge. in Arial font, size 2 as seen in the image below.
Save your file, refresh your page in the browser and make sure it looks like the status check below.
Your done! Upload all the HTML files BELOW.


